组件 | 设计模式 |《vue 模式 1.0》| vue.js 技术论坛-金年会app官方网
文档原文
vue 的组件是 vue 应用的构建区块,允许使用标记(html)、逻辑(js)、样式(css)来构建组件。
在构建 vue 应用时,很重要的一点是,需要理解每一个 ui 上显示的元素都是 vue 组件的一部分。因为 vue 应用通常都是由组件嵌套构成,形成一个分层的结构。
在构建应用时为何要设计良好的组件结构,可重用性和可维护性是其中很重要的原因。
为了能更好地理解组件,我们直接创建一个。最简单的创建一个组件的方法就是不使用构建工具(例如 webpack),在 javascript 中创建一个包含 vue 特定选项的对象。
export default {
props: ["name"],
template: ``,
};
这个组件定义了一个 props 属性,接收一个单独的参数 name。参数用于父组件向子组件传值。
template 属性定义了组件的 html 模板。在这个例子中,模板中包含了一个
组件:构建的基本区块
我们将通过一个简单的例子来阐述组件如何可以分割为更小的组件。观察下面的 tweet 组件:

上面的组件使用 vue 实现出来就像下面的代码这样:
<template>
<div  class="tweet">
<image  class="tweet-image" :src="image.imageurl" :alt="image.description" />
<div  class="user">
<image  class="avatar" :src="author.avatarurl" :alt="author.name" />
<div  class="user-name">{{  author.name  }}</div>
</div>
<div  class="details">
<div  class="tweet-text">{{  text  }}</div>
<div  class="tweet-date">{{  formatdate(date) }}</div>
<!-- ... -->
</div>
</div>
</template>
<script  setup>
// ...
</script>
观察上面的组件,你会发现它很难用。因为它的内部太耦合了,而且各个部分没办法重用。为了让组件更容易复用,我们可以将它提取为更小的组件。
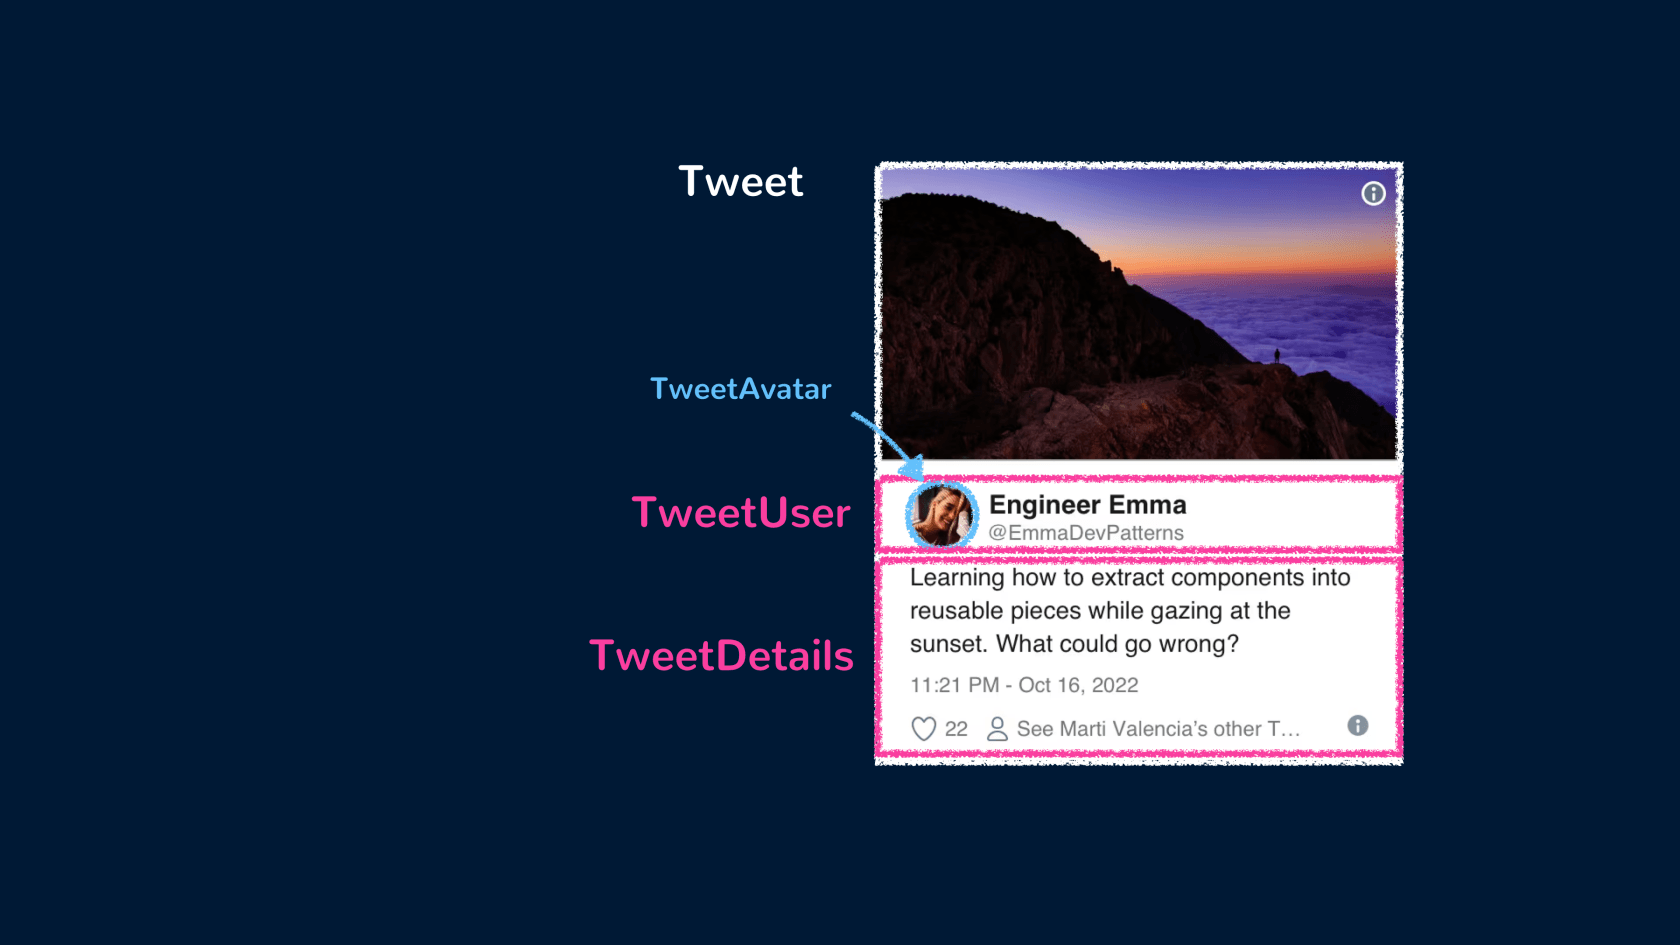
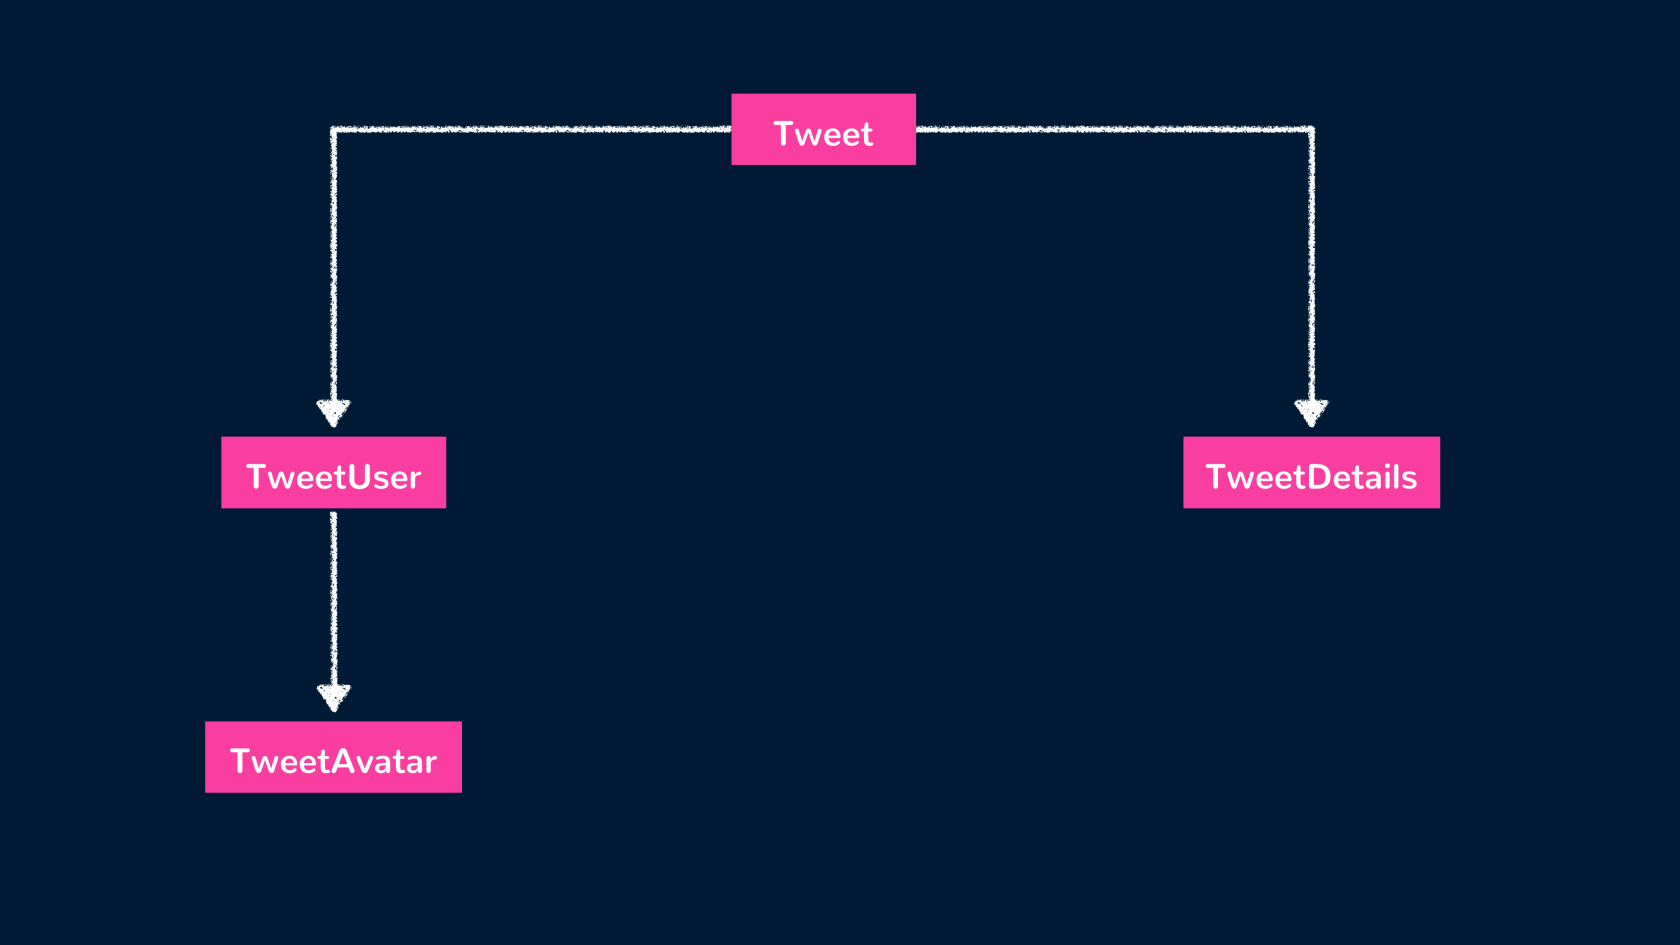
tweet 作为父组件,包含了 tweetuser 和 tweetdetails 两个组件。tweetuser 展示用户信息,并包含了一个展示用户头像的 tweetavatar 组件。tweetdetails 用于展示 tweet 的额外信息,例如 tweet 文本和发布日期。这时组件结构看上去就像:
tweet 貌似是作者虚构的一个类似微博的东西。
我们首先创建子组件 tweetavatar,包含头像图片元素。
<template>
<image  class="avatar" :src="author.avatarurl" :alt="author.name" />
</template>
<script  setup>
// ...
</script>
然后创建 tweetuser 组件,包含 tweetavatar 组件和其他相关的用户信息。
<template>
<div  class="user">
<tweetavatar />
<div  class="user-name">{{  author.name  }}</div>
</div>
</template>
<script  setup>
import { tweetavatar } from  "./tweetavatar.vue";
</script>
接下来我们创建 tweetdetails 组件,渲染其它的 tweet 中的信息。
<template>
<div  class="details">
<div  class="tweet-text">{{  text  }}</div>
<div  class="tweet-date">{{  formatdate(date) }}</div>
<!-- ... -->
</div>
</template>
<script  setup>
// ...
</script>
最后,我们可以使用这些新创建的子组件,来简化父组件 tweet 的模板结构。
<template>
<div  class="tweet">
<image  class="tweet-image" :src="image.imageurl" :alt="image.description" />
<tweetuser :author="author" />
<tweetdetails :text="text" :date="date" />
</div>
</template>
<script  setup>
// ...
</script>
提取简化组件结构看上去是很繁琐的工作,但是提取可复用的组件让大型的应用的编码工作变得更简单。提取组件时要考虑的一个重要的标准是,如果 ui 的某个部分被多次使用(按钮 button、面板 panel、 头像 avatar),或者是某个组件本身就足够复杂(应用 app、信息流 feedstory、评论 comment),那么此时很适合将其提取到单独的组件中。
响应式状态
响应式状态是 vue 组件中的一个重要概念,可以实现动态的、响应式的用户界面。组件所渲染的用户界面会根据响应式状态的数据变化更新而自动更新。
在 vue 中,我们可以使用 ref 函数(对于原始类型)和 reactive() 函数(对于引用类型)来定义响应式数据。我们来看一个计数器组件:
<template>
<div>
<h2>counter: {{  count  }}</h2>
<button @click="increment">increment</button>
<button @click="decrement">decrement</button>
</div>
</template>
<script  setup>
import { ref } from  "vue";
const  count  =  ref(0);
const  increment  = () => {
count.value;
};
const  decrement  = () => {
count.value--;
};
</script>
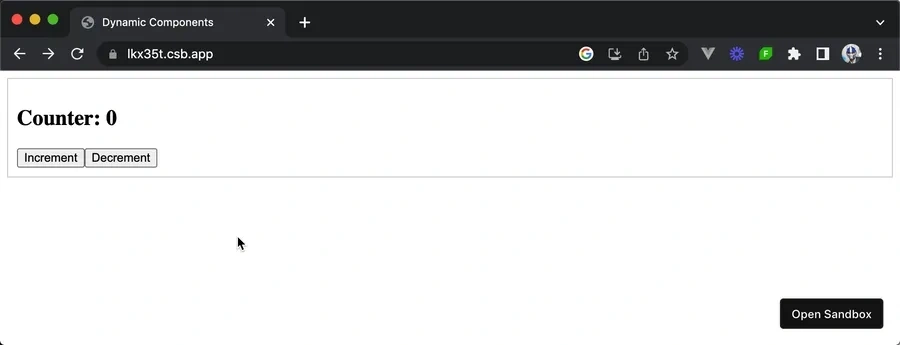
在上面的例子中,我们定义了一个响应式属性 count,并设置初始值 0。模板部分使用双花括号语法显示 count 当前的值。
组件的模板还包含两个按钮:increment 和 decrement,并通过 @click 指令分别绑定到 increment() 和 decrement() 方法上。在这些方法中,我们修改了响应式属性 count 的值。vue 检测到了变化,并使用新的值自动更新了组件的渲染。
vue 组件中的响应式状态,对跟踪和管理数据的变化提供了一个无缝的方法,从而让构建可交互的动态的用户界面变得更加容易。
总结
本文主要简单介绍了组件的概念。在其它文章和指南中,我们将深入了解 vue 和 vue 组件的常见并且至关重要的设计模式,这其中包括但不限于: